Now, this was not my idea. A fabulous independent nail polish maker- Mei-Lynn at My Ten Friends- tossed out a challenge: the first person who could replicate the Jupiter cake from www.cakecrumbs.me would earn a bottle of nail polish. And since I am a huge My Ten Friends fan, I had to try this! If you want to see all the recipes and detailed tutorial of the Jupiter cake, give www.cakecrumbs.me a visit. I made this cake over a few weeks time, freezing the layers as I went along. Time-wise and depending on your cake skills, this could take you at least a few days to create. Just take your time, and you can do this, too!
 |
| My kitchen: this is how it all began! |
 |
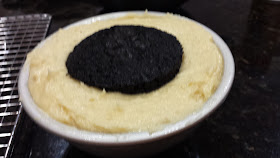
| The center chocolate layer. This was the easiest one to make. So cute, too! |
- Make one batch of the chocolate batter for the 2.75 x 1.375 inch pan. You will have lots of batter for lots of little hemispheres. Make extras. You may need them in case something runs amok with your layers. And if it doesn't, then you've got lots of little bite-sized chocolate cakes. Damn, they're yummy, too!
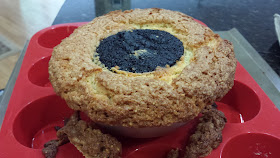
- Make two batches of the almond cake batter (one batch for each half) for the 5 x 2.5 inch pan. Bake at 325 degrees for 70 minutes- check for doneness at 65 minutes. Use an oven thermometer!
- Make four batches of the vanilla cake batter (in other words, two batches for each half) for the 8 x 4 inch pan. If you're using the 8 inch pan, you may even want to make 6 batches of the vanilla cake recipe (three batches for each half). I didn't feel like I had quite enough batter with four batches, and carving before the last phase of assembly would have been easier for me. Bake at 325 degrees for 80 minutes. Check for doneness at 70 minutes. Again, use an oven thermometer!
 |
| Blurry, but you can see the fully baked chocolate layer inside the almond batter. It's about to go inside the oven. |
 |
| Uh oh. This is what happens when you don't have any support under the hemisphere pan when baking. Lopsided center! Gah! Time to try again. |

Trying again, I had the idea of stabilizing the hemisphere pan with a silicone muffin pan. It worked!
 |
| Perfect. |

Remember how I mentioned about greasing/flouring your pans well? Again, Pam for Baking is awesome, and my cake easily popped out of the pan.

I didn't think I had enough batter for this layer. I figured that I should try anyways!
 |
| Looks like a huge wave crashing along side a cliff! |
I made sure this was level before putting into my oven, supporting it with a silicone brownie bite pan. Baked nicely!
 |
| Half on the left is complete, the right half needs to be baked into the bigger pan here. |
")
Both finished now! I wrapped them up in plastic and foil, then stored them in the freezer until I could get to the last part- making fondant!
I make my own MMF- marshmallow fondant. Here's the recipe I use:
Ingredients
1 (16 ounce) package miniature marshmallows
Directions

Yep, that's me, getting ready to carve up my layers! Garrrghhhh!!!
 |

Do your best to keep your layers level while carving. Take your time!

When both sides have been carved and level, use some buttercream frosting and adhere those layers together! Planet Sandwich- yum!
")

I like to use The Mat for rolling out my fondant. This makes it ridiculously easy to get nice, smooth fondant, and you don't need to worry about rushing.

 Here you can see my fondant before rolling it out. I microwave my fondant for about 15 seconds before kneading and shaping it on The Mat. This makes it really soft and pliable- and reduces the amount of effort getting the fondant rolled nice and thin.
And now here it is all rolled out! It took me about 5 minutes to do. My cake is 8 inches in diameter, so I made sure my fondant was rolled out to 18 inches to be sure I had some extra to work with.
 |
| Boo! Looks like a ghost. |
When you're ready, take the top layer of The Mat off. The fondant will stick to the bottom layer. Then pick up the bottom layer of The Mat, position it over the cake, and let the fondant gently pull itself off. Check Youtube for a full tutorial on The Mat- you'll be amazed at how it makes working with fondant so easy!
") |
| All smoothed out. Looks like a planet to me! |
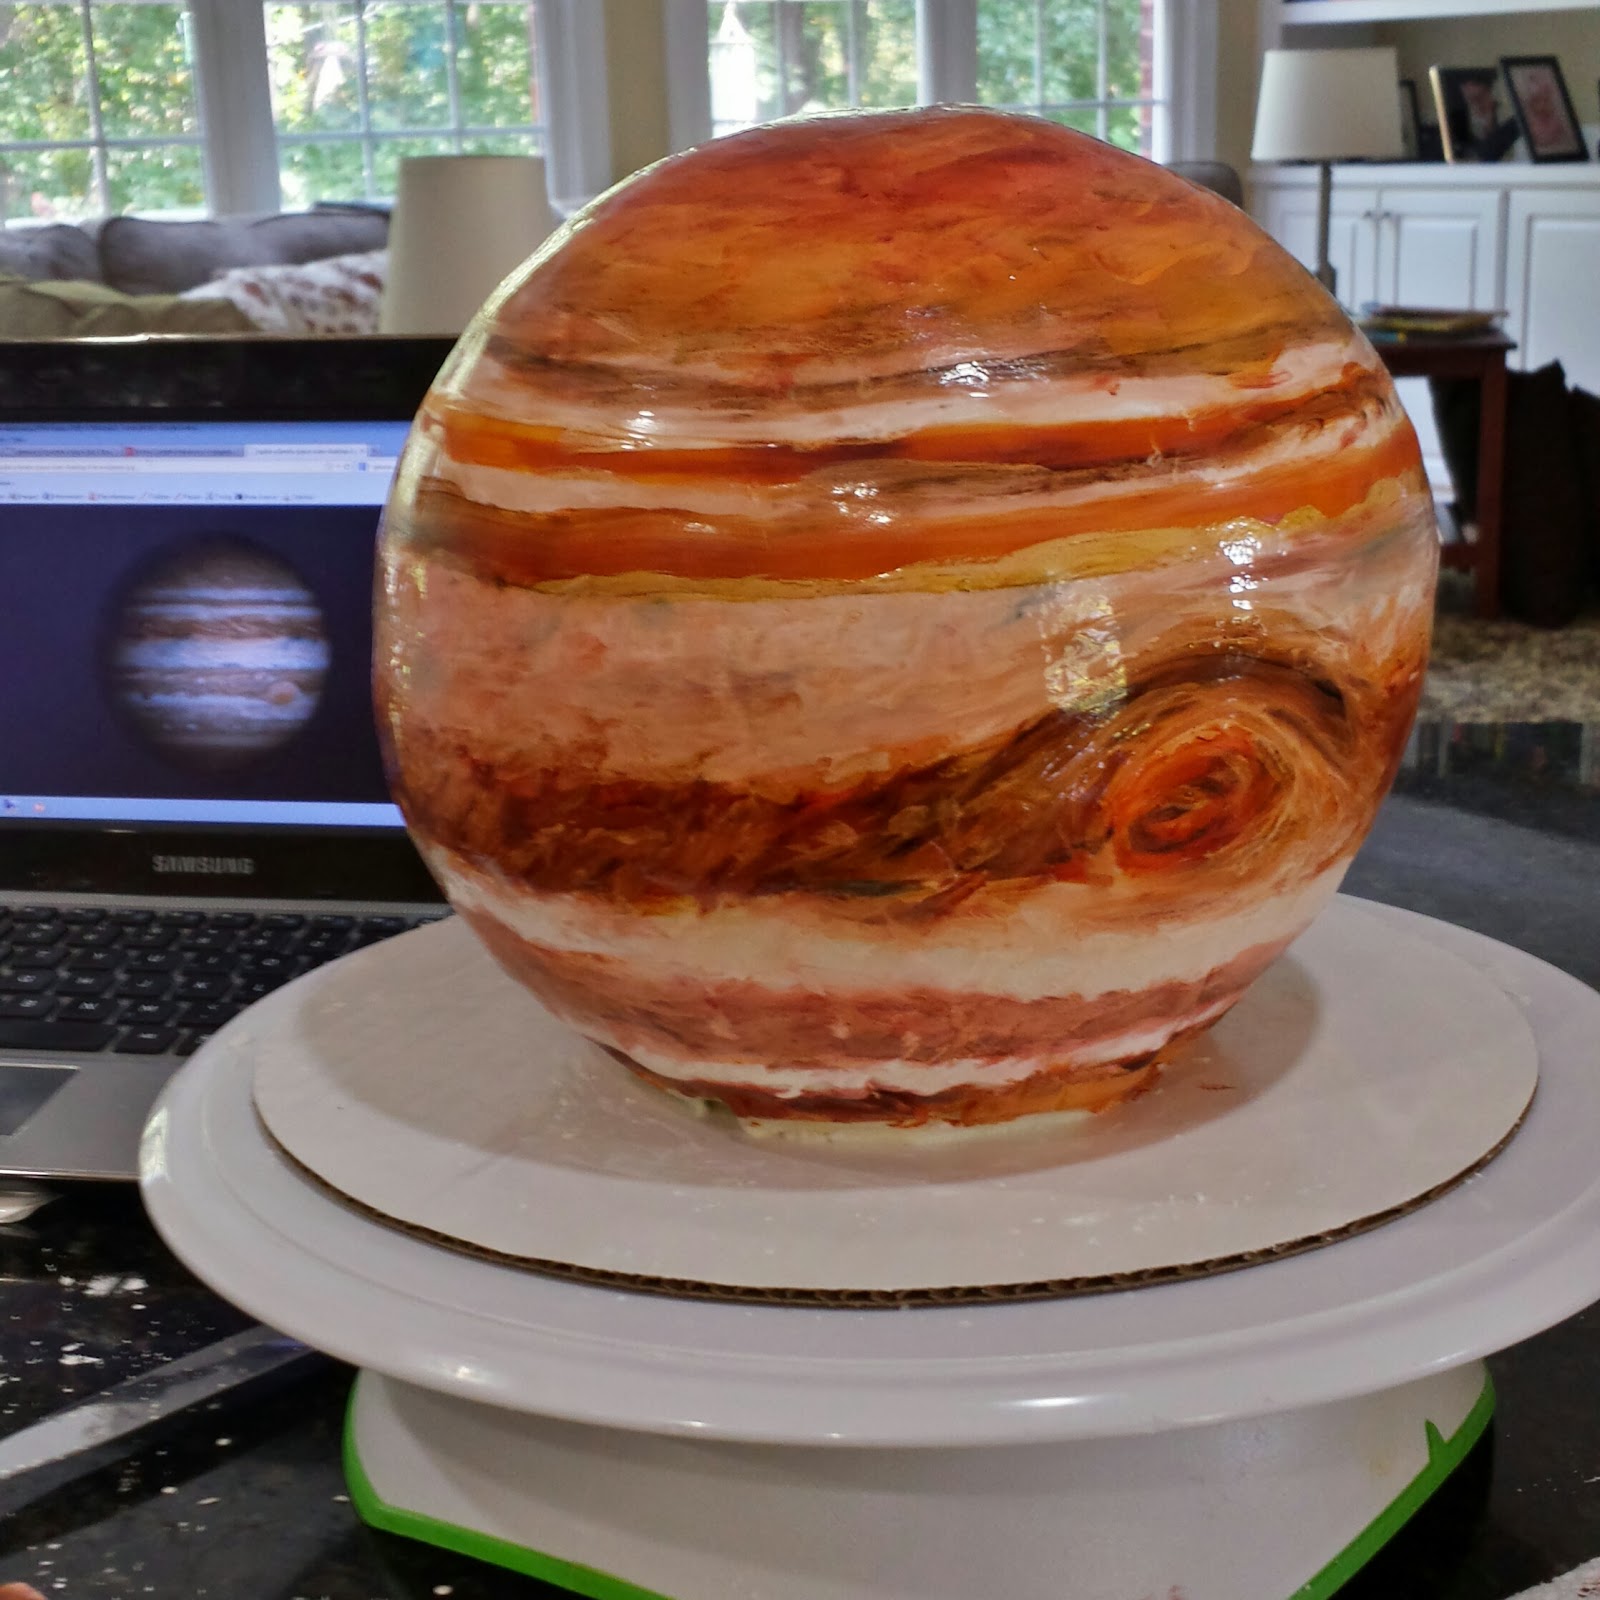
After I smoothed out the fondant, it was time to do the fun part- paint!
 |
| My box of edible painting supplies. |
 |
| A plate worked well as my painters' palette. |
With my food safe paint brushes, gel food coloring, and some photos of Jupiter on my computer, I was ready to go!
")
And this is what it ended up looking like. I'm not a painter, so this is as good as I could do! And just so you can see it all the way around, below is an animated gif of it in action. I can't say it's 100% accurate as Jupiter, but it's not a bad representation, I think!
") |
| Jupiter cake rotates (animated gif). |
")
Later we cut into the planet... I don't know why, but doing this made me incredibly nervous!
 |

Whew! It held up great!

Because the slice was so big, it was necessary for me to divide it in half for my kids. They didn't care- they loved it all!
")
")
And you can see that the kids were happy with it, too. For me, that's what really counts!
Have you tried making a Jupiter cake? Or any other spherical/hemisphere cakes? What did you think about the process? And again, I have to thank Mei-Lynn over at My Ten Friends for sending out this challenge. I don't think I would have tried this cake if a bottle of My Ten Friends nail polish was not involved. :) Cheers!
I love it.. You're a genius!
ReplyDeleteWow! Wish i could bake beside u and get some lessons.
ReplyDelete