Tiered Fondant Birthday Present Cake
With all the sweets I've been making lately, I knew that the least I could do for my (amazing) husband's 45th birthday was to make him a cake. I asked him what he wanted it to look like, and all he said was, "I want a square cake." Typical man, right?
It took me three days to get this whole thing together, but it wasn't the most challenging cake I've ever made. I had to allow extra time for the detail items to dry (like the bow and curls). If you're familiar with fondant, this kind of thing is a breeze. If you're not, it might take you a little longer, but it's not that hard to do!
So if you want to make this cake, here's what you need to know. First, I make my own fondant. Marshmallow fondant is super easy to make, and it's cost effective, too! Here's the recipe I use:
Marshmallow Fondant (also known as MMF):
Ingredients
1 (16 ounce) package miniature marshmallows
- 4 tablespoons water
- 1 teaspoon Lorann baking emulsion (I use Princess or Sweet Buttery Dough, but you can just plain ol' vanilla if you want)
- 2 pounds confectioners' sugar, divided
- A few tablespoons of butter or Crisco
Directions
- Place the butter or Crisco in a shallow dish, and set aside. You'll need this later to put on your hands when kneading the fondant.
- Place the marshmallows in a large microwave-safe bowl, and microwave on High for between 30 sec- 1 minute to start melting the marshmallows. Carefully stir the water and vanilla extract into the hot marshmallows, and stir well until the mixture is smooth. Slowly mix in the confectioners' sugar, a cup at a time, until you have a sticky dough. Keep 1 cup of powdered sugar on the side for kneading. The dough will be very stiff.
- Rub your hands thoroughly with butter or Crisco, and begin kneading the sticky dough. As you knead, the dough will become workable and pliable. Turn the dough out onto a working surface dusted with confectioners' sugar and continue kneading until the fondant is smooth and no longer sticky to the touch, 5 to 10 minutes.
- Form the fondant into a ball, wrap it tightly in plastic wrap, place in an air-tight bag, and let rest for a few hours. You can leave it on the countertop overnight- refrigeration is not required. It will last for a few weeks.

I made two batches of MMF for this cake. You'll end up with extra MMF.
I used half of one of the batches to make the decorations. Divide that into three portions. I kneaded gel food coloring in electric purple, electric green, and electric orange to get the colors you see here. (Make sure you store your fondant in an air tight bag when not using!) To that, I added a small amount of Gum-Tex to the fondant to help harden up the fondant. Gum-Tex and fondant together are easier to work with than just gum paste alone because Gum-Tex/fondant dries more slowly. The challenge to this is that you need to allow more time for these to dry well, so plan on making these at least 2 days before your cake.
Using a star fondant plunger cutter in three sizes, I cut out lots of little stars. Easy! By the way, I bought my set of three star plunger cutters on eBay- they were less than three bucks for the set!
The curls were created by making long thin strips of the fondant rolled about 1/16 inch thick. Using a wooden dowel about 1/4 inch thick (see the lower left corner of the photo with the curls and stars), gently wrap the strip in a long spiral, and let it set out to dry for a few hours. When your time is up, gently slide the curl off the dowel . When they're still soft, you can gently make bends in the curls if you want (or you can just leave 'em straight). Set aside to fully dry for at least 2 days. You need to make sure these are completely dry and hard before placing on the cake or else they WILL break! This happened to me, so I'm passing along this tip so it won't happen to you.
I didn't get photos of the pieces of the bow I created, but here's how I did it (in a nutshell). I rolled out fondant to about 1/16 thick, and made 1-inch wide strips about 8 inches long. I made 14 of these. I formed these into large teardrop shapes and glued the ends together. Dry them on their sides so they will hold their loop shape. Flatten out one of the sides, so it will look more like a pear on one side and flat on the other. This is so when you form your bow, the flat bottoms will sit nicely against the cake. Cut the end so that it resembles a V shape. Now make a 1/4 inch thick, 3-inch wide fondant circle and a 2-inch circle from the same color fondant. Set aside. Let these dry well, or else they will break when you assemble the bow!

You can also make your cake in advance, too. I baked two cakes: an 8-inch square cake, and a 6-inch square cake (I use Fat Daddio pans). After each cake fully cooled, I torted them into two layers, wrapped each layer in plastic wrap, then wrapped each cake together in plastic, then sealed them up with foil. Once all that was done, I put both cakes in the freezer until I was ready to decorate. I took photos of the 6-inch cake as I was filling it so you can see what I did.
The 6-inch cake is a vanilla cake (box mix) that I added banana extract to. The spots you see in the cake? Mini chocolate chips, of course! I added the chocolate chips myself- you must try this flavor combination because it's incredible!
I planned for the fondant to be white, and the filling for this layer was going to be chocolate. I didn't want the filling to show through the fondant, so I piped a dam of stiff buttercream about 1/4 inch inside the edges of the cake. You don't need a special tip for this, just use a bag and empty tip coupler.
I piped the chocolate buttercream (medium consistency) inside the dam. Remember, no need to have a piping tip for this- just use the empty coupler!
Then pop the second layer on top! Looks like a huge chocolate chip cookie sandwich to me. Yum!
I used a large piping bag and a Wilton tip 789 to apply the crumb coat. This bag is ridiculously huge- it's so big that I can fit my ENTIRE arm in it. I need to buy a smaller one soon. Needless to say, I didn't have to fill the whole bag to ice this cake.
I'm not very good at icing with this tip, but it speeds up getting the buttercream onto the cake.
A bit messy, but I don't need perfection with the crumb coat.
Let me add a great tip to help with the appearance of your cake. Have you ever seen a layer cake with frosting bulging out of the middle? Be sure to let your cake settle for at least a few hours before applying your final coat (either frosting or fondant). Professional bakers let their cakes settle for 24 hours after applying the crumb coat. Some people place a ceramic tile or book on top of their cake to speed this process up. I forgot to do this step, and I ended up with some bulging. I don't think anyone but me noticed, but I didn't like it. So learn from my mistake and settle your cake well before decorating!

This is the 8-inch layer, covered in the white fondant. I made the orange ribbons by rolling out fondant to between 1/4 inch thick, and cutting it with a fondant roller. I applied one strip to each side with edible glue. Edible glue can be made by mixing a small amount of Gum-Tex with boiling water. Let it cool, and it will turn into a gel. Apply the glue to the fondant with a brush, and place the strip of fondant onto the cake. Hold it gently in place for a few seconds to let it set. It dries clear, and is really effective for sticking decorations on!

I also added 5 wooden dowels into the cake for support. Simply insert the dowel into the cake and mark the dowel where the top of it just sticks out of the cake. Pull the dowel out of the cake and cut at the mark. Then put the cut dowel back in the cake.
Here is the cake with the second layer added. I made fondant ribbons from the green fondant, cutting with the fondant roller cutter.
I really like how the green ribbon turned out!
To be honest, I didn't have a set plan in mind when I began decorating this cake. Not always a good idea when it comes to cake design! I didn't like how the bottom edges of my cakes were looking, so I had to think of something to do to cover them up. And I wanted to add a purple element to the cake. So I opted to make a purple 'ribbon' along the bottom edges, and it worked!
I was rushing my cake along, so I didn't get pics of all the steps of making this cake!
I didn't let my bow loops dry completely, and they began cracking on me when I assembled the bow. Here's how the assembly goes when everything actually works:
Glue several of the loops onto the 3-inch circle, in a circle with the points of the Vs touching. It should resemble the beginnings of the bottom of a big bow. Once this is dry, glue the 2-inch fondant circle on top of the Vs. Once these are dry, add another layer of bow loops. You can see where this goes. My loops began falling apart on me at this point, so I improvised by adding curls wherever I saw too much space. I did this by using stiff buttercream in a piping bag with an empty tip coupler (the same stuff I used when piping the dam on the layers). I used the buttercream as a thick glue to support all the curls, and it worked! No one noticed my flawed bow at all. Whew! Remember, whenever decorating a cake, there are no accidents- just more opportunities to embellish!
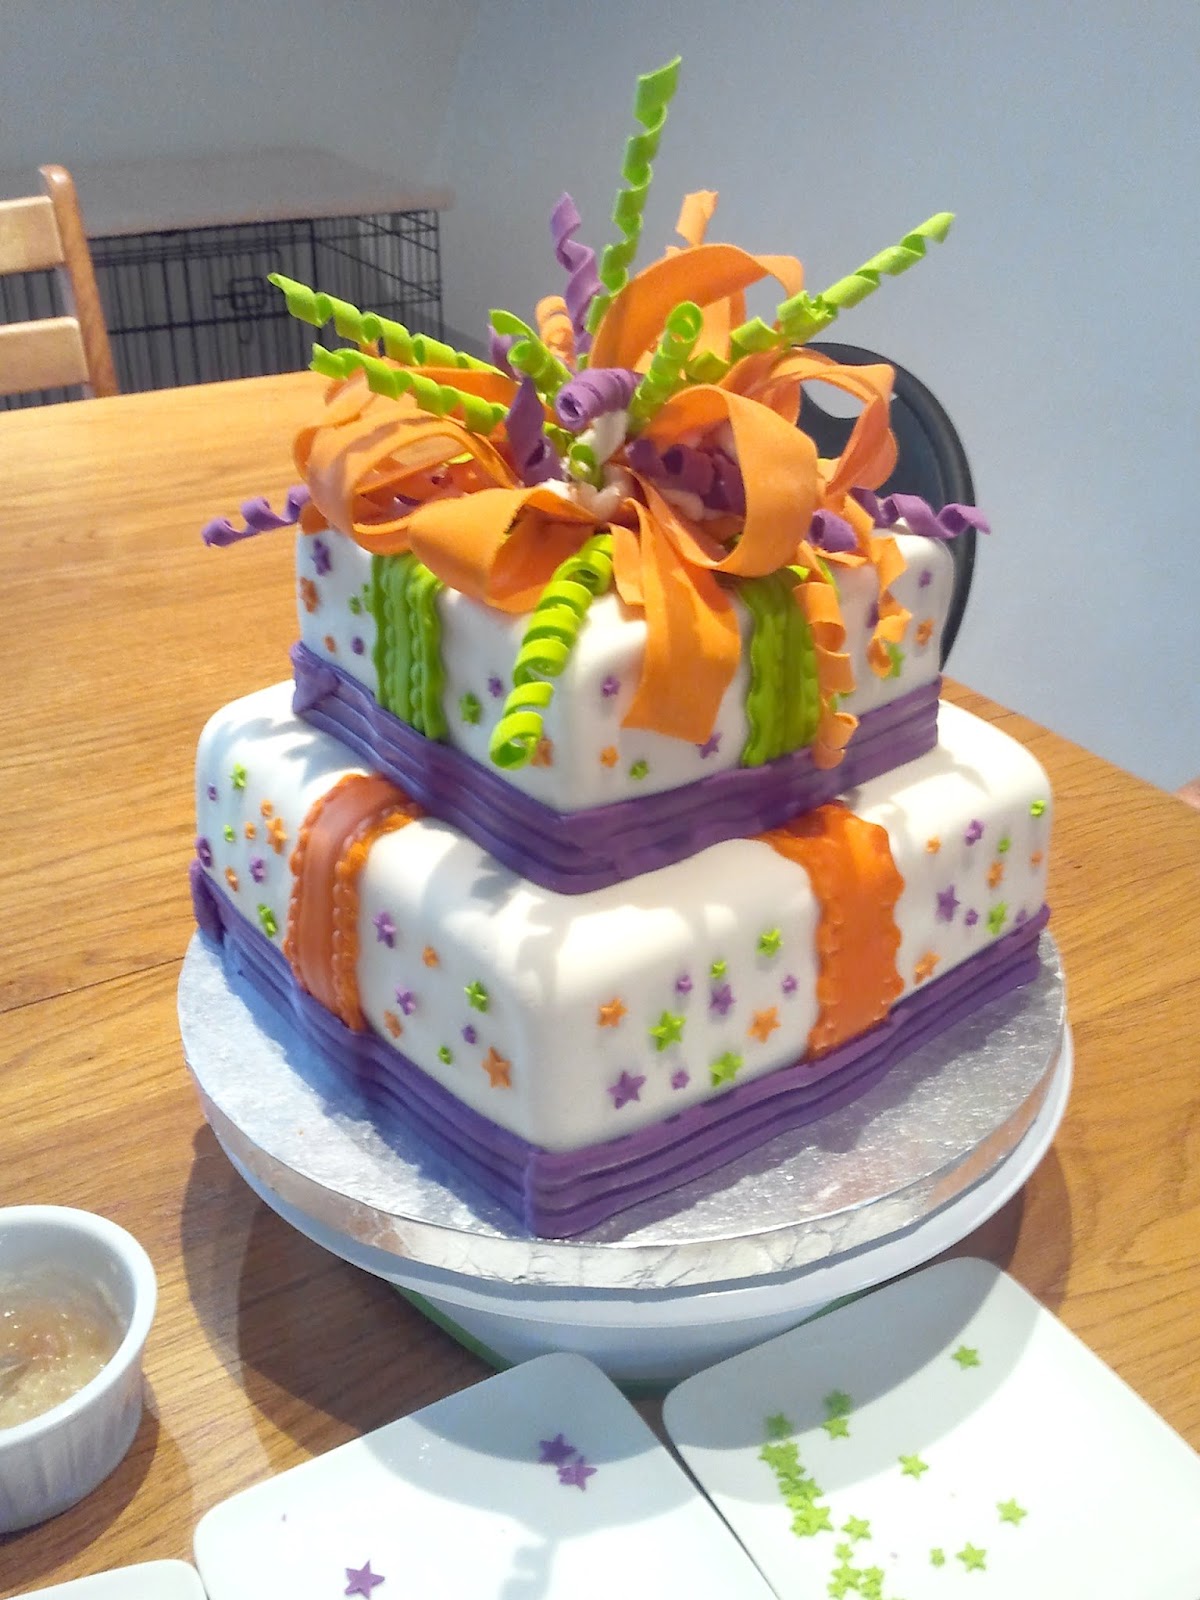
For the final touch, I added lots of those tiny stars I made earlier. Using my Gum-Tex glue and a brush, I gently glued tiny stars all over the cake.
I like the combination of colors, and it turned out so festive! My mother-in-law thought it was just an elaborately wrapped gift when she first saw it.
I carried this cake in my lap in the car to the restaurant where we celebrated my husband's birthday, and I think that it weighed about 10 pounds. I was terrified that it wouldn't make the trip. It was a 45-minute drive down a winding mountain road.
Much to my relief, it did make it. I received many, many compliments on it from the staff and from patrons of the restaurant. Many people thought it was professionally made. But the most important thing for me was that my husband had a cake that he would always remember. He absolutely loved it. And I love him. :)
Happy birthday, Sweetie!


 You can also make your cake in advance, too. I baked two cakes: an 8-inch square cake, and a 6-inch square cake (I use Fat Daddio pans). After each cake fully cooled, I torted them into two layers, wrapped each layer in plastic wrap, then wrapped each cake together in plastic, then sealed them up with foil. Once all that was done, I put both cakes in the freezer until I was ready to decorate. I took photos of the 6-inch cake as I was filling it so you can see what I did.


Thank you so much for showing how you did this! It's beautiful! I was not quite understanding the filling part with the dam from other sites and your photos cleared it all up for me!
ReplyDeleteAwww, thanks! So glad it helped you understand the filling process better. :) This was a really fun cake to make. Cheers!
Delete