A few weeks ago I made
Puppy Dog Cake Pops, so naturally I also had to represent cats, too. For your consideration, I present Pretty Kitty and Tom Cat cake pops!
I'm assuming that you already know how to make a basic cake ball. If not,
look here. Once you have your cake balls assembled, follow the instructions below.

First you need a bunch of large candy corn. These will be the ears on the cats. Here in the photo to the left, I have used extra pastel candy corn from my
cake pop bunny project.
Cut off the wide base of the candy corn so that it makes a rough edge at the bottom. Not only does it make for a proper ear size for the cake ball, but the rough edge allows for better adhesion to the cake ball.
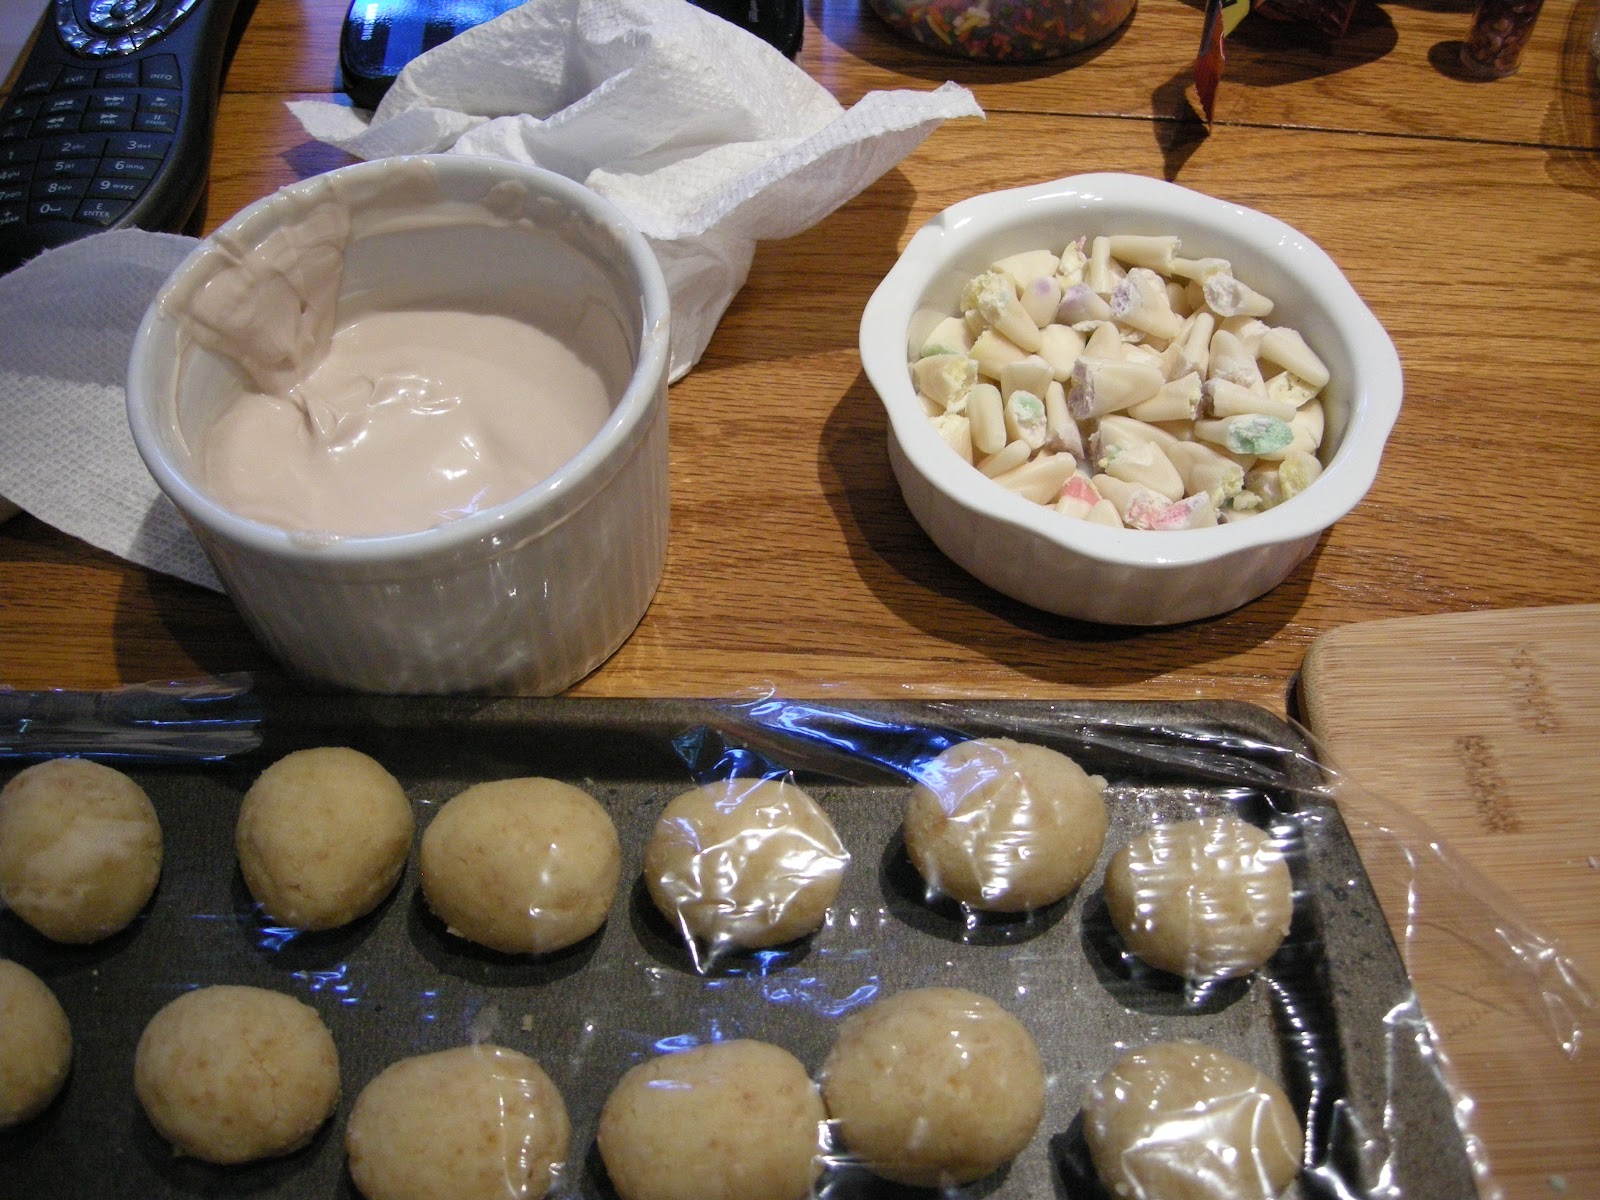
Here I have my chilled cake balls, all of my pre-trimmed candy corn 'cat ears', and a ramekin of extra melted candy coating for 'glue'.
First, dip the end of one of the candy corn pieces into the candy coating.
Then take a cake ball and firmly press the coated end of the candy corn into it. Don't press too deeply or else you may end up cracking the cake ball.
Smooth the coating around the base of the candy corn. It's not entirely necessary, but it will make for a nice finish around the ears when you completely coat the pop.
Here's how it looks with both ears attached.
And here's how a pop looks if you DON'T smooth out the candy coating around the bases of the ears. Kind of lumpy, and it looks unprofessional.
You may be wondering why I didn't place these on the sticks at this stage. After all, it would be much easier to let these dry on sticks rather than on a baking sheet. Well, I like my cake pops to look 'finished', or 'professional'. I'm a bit of a perfectionist when it comes to these!
So, when you put a stick into your cake pop, you need to dip the stick into a bit of candy coating first. As you insert the stick into the cake ball, some of the extra candy coating oozes out and onto the base of the cake ball. When you dip your cake ball immediately after this step, you end up with a nice smooth base around the area of the stick. This is because the still-melted candy coating merges nicely with the fresh melted coating when you dip. If you wait and let the oozed candy coating set around the stick, you end up with a big lumpy area around the base of the stick.
Go here to see what I'm talking about (it's from my first cake pop batch, a total failure!). I'm sure that not many people would notice this, or even care! This kind of thing bothers me, though.
I set the entire 'litter' of cat heads into the fridge to set for about 30 minutes. This also helped to re-firm up the cake balls for final dipping.
Here is a cat head being dipped. I found that you can get the best finish of the coating by tilting the pop and tapping off the excess coating at an angle of one of the ears.
Here is the litter, fully coated and ready to decorate!
Read on to see how these cuties came to life!
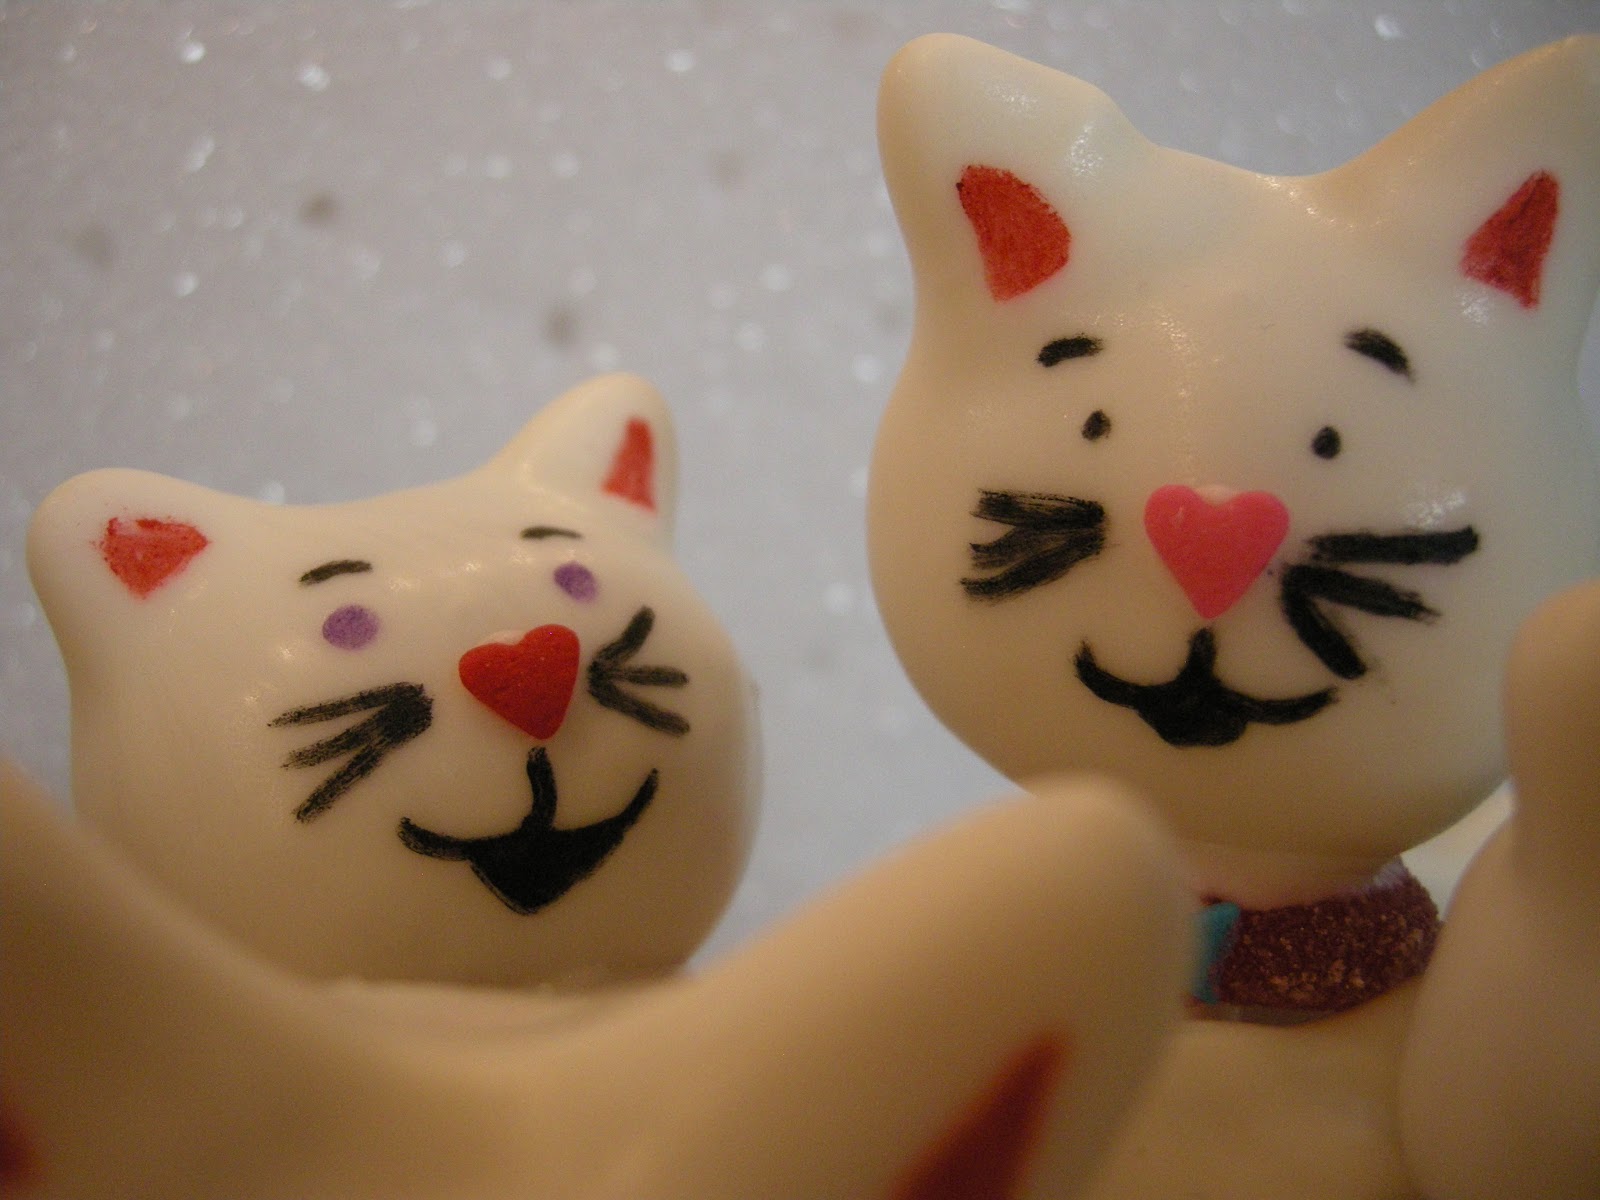
Here you can see a few stages of decoration. I used candy hearts for the noses. They were attached with some extra melted candy coating.
The face was drawn on with an edible ink pen. I used a gummy Life Saver, attached with extra candy coating, for the collar. I used gummy Life Savers because their soft consistency goes very well with the soft consistency of the cake ball and candy corn. I tried using regular crunchy Life Savers on a prior project, and they didn't work well (taste and texture-wise). These gummy Life Savers were sour. I didn't think the taste would go well with the sweetness of the cake pop, but I was very surprised! The sour of the gummy makes for a really nice finish to the sweetness of the pop! And I like the visual texture of the gummy collar better than the hard Life Saver collar. Looks like it's been 'blinged'!
As I was thinking of 'bling', I thought I could add something more to the collar, so I added a small candy butterfly to it. It worked!
And I also thought of adding something for the 'girl' cat cake pops. Here I added a small butterfly 'bow'. I like this very much!
You can use more colors than just black when drawing your faces. Try changing the eye colors for more appeal!
You can also vary the expressions by changing the eye or mouth shapes. I like including eyebrows for expression as well.
I even used some candy lips on the one to the left, to make the cat look like she was puckering up for a kiss.
The one on the right looks like he's enjoying chewing on something yummy.
All bunched together! Click on the images if you want to see them much bigger.

 First you need a bunch of large candy corn. These will be the ears on the cats. Here in the photo to the left, I have used extra pastel candy corn from my cake pop bunny project.


These are absolutely adorable! I was looking around for ideas to make cat cake pops for a little girls birthday party and I really like yours. Good job.
ReplyDeleteThank you for your kind words. These were so easy to make, I'm sure you'll have fun with them. I hope that your cat cake pops turn out fabulous!
DeleteCheers!
What brand of edible markers did you use? I soo want mine to turn ou and I love yours! I'm doing mine for my daughter's kitty cat birthday party. Im excited to try this!
ReplyDeleteHi Tam,
DeleteI use Americolor edible ink pens. I use a small ceramic plate to test the flow of the pen, and sometimes to increase ink flow.
To do this, I smash the tip a bit into the plate at a 45 degree angle. This tends to soften the tip, making it more like a fat paintbrush. It also makes for more ink to flow- which means you barely need to touch the cake pop in order to get nice, black lines on the cake pops.
And if you have a steady hand, don't rule out using edible ink and a food-safe paintbrush as well. This method can work quite nicely if the pens aren't working for you.
Good luck, and happy popping! Cheers!